



Showing posts with label Party. Show all posts

Friday, October 5, 2012

Create your own cake stencil

I have a great time planning big blow out themed parties for my kids, as seen here and here. Be forewarned if you start big you will feel as if you must top yourself each year which will result in you pulling out your hair and the inevitable sleepless night the day before the party. Don’t say I didn’t warn you.

My daughter declared she wanted a fashion / beauty theme for her 8th birthday this year so I scoured pinterest, yes I’m still obsessed, and came up with a Breakfast at Tiffany’s theme. I love to use each birthday or celebration as an opportunity to play with new techniques for cakes and I wanted to finally tackle stenciling a cake.
The entire cake is edible other than the ring. The box started to "melt" a bit from all the airbrush coloring.  Airbrush was giving me issues & required many coats. I learn from each "mistake" to make the next cake better.
If you’ve ever wondered why those beautiful cakes cost so much money let me tell you I now know why. Hours and hours are spent creating them and supplies are expensive. I had admired a cake sometime last year that had used stenciling, so off to my favorite cake supply website to buy some stencils. Wow those things can cost $20 or more for one stencil!  I just knew my trusty KNK (digital die cutting machine) wouldn’t let me down. I figured I could do that myself and the best part is….  for much cheaper.
Make sure you are using food safe products whenever working with anything you might eat. I found a 10 pack of food safe stencil sheets for $10!  I can make 10-20 stencils out of them. I like the idea of $0.50 – $1.00 per stencil instead of $20 or more.
I found a flourish font on dafont.com called “Floralia” and modified one of the dingbats into a damask looking stencil. I created a rectangle around the design and at the top left I used the built-in circle shape and welded the two together to give myself a tab to pull off the stencil more easily.  I am more than happy to email the cutting file for your personal use.  I've yet to figure out how to have a download link on my site.  I will update as soon as I do.
The internet is a great source and I love youtube and Cakecentral.com when trying to learn a new cake technique. I was nervous with a white cake and black royal icing that this could be a “royal” disaster.


Place a very light coating of shortening on the stencil to help it adhere solidly to the cake.


 Then you take your spatula and coat over the stencil with your royal icing.


Take a bench scraper tool and scrape off the excess. You have to be careful with this step. I had to go back over some spots because I scraped too much off. You want it to be an even layer for the best appearance.


Then while you hold your breath and pray (yes those steps are necessary) you slowly pull the stencil away from the cake.


I was so pleased with how much easier it was than I had thought it would be. Make sure to clean off your stencil between each side of the cake or better yet, cut more than one since the materials are so cheap.


Imagine all the possibilities, the sky really is the limit to what type of stencils you could create. Is your handwriting horrible like mine? Create a stencil with the wording you’d like to use and stencil it on your cake instead. You could also airbrush a design using these stencils if you have a cake airbrush set.


*I used Royal Bakery's tutorial to create the Tiffany box cake on top. I'm sure I didn't do her justice. She's fantastic, check her out on facebook, Royal Bakery

I will begin posting more details on how to throw your own Breakfast at Tiffany’s themed party in the next couple weeks. 


*Notes for those with a digital die cutter, particularly a KNK

A quick note on cutting the material. I had actually sent it to Michelle Hessler to see if the Zing would cut out this material. She had the following tips to share.
“You need to cut it in two passes because the glossy side is harder, and you can get through the soft side easy, but since the harder side cuts through last (lays on the mat) you need the second pass to guarantee it will cut through at all points. It cuts really well, and doesn’t use a lot of pressure at all.
I also didn’t let my pinch wheels go over the material at all. My mat is good and sticky, and so I just made sure it was applied on that well. I didn’t want the wheels on the material, because they have some adhesive on them, and I didn’t want that to touch the food safe side of the stencil.”
Thanks Michelle for all your help with this project.


Monday, October 24, 2011

Pirate Fondant Figure

Ok, we've been invited, seen the decor, and even learned how to make a pirate mast.  Now onto the cake!


Now this had to be one of my most fun figures.  I was so scared of doing them when I first attempted tackling Buzz Lightyear last year but now it's one of my favorite things to do.

I started by mixing up some brown gumpaste to create the boots.  I know at this stage these don't look all that appetizing so keep your mind clean people LOL.

***TIP ***
When making legs, arms, hands, anything double that requires it to be even. Roll into a sausage shape, I like to use my fondant smoother to keep it more uniform when rolling it.  Cut it in half and that will keep things even.

Create a bit of an elbow type bend.


Round out the toe are a bit but not too much.  Now use your gumpaste ball tool to make indention's at the top of the boots.


Here you see me rolling out black fondant to make the legs.  I'm using the fondant smoother that I mentioned earlier.


Bend them around like this picture and now you have two legs.


I like to use bamboo skewers for support but I'm going to try thicker dowels next time.  Sometimes my figures seem to be a bit "holy" bending a bit backwards towards the heavens giving glory.  =)  Sometimes they need a little stick in the bum to help support them so that's my next thing to tackle with these guys.

I used a little tylose glue on the dowels before sticking them through the legs and boots, find that recipe at the end of my hula girl figure tutorial.  Remember to leave at least an inch and a half below the bottoms of the boot to give you something to stick into the cake later on.


It's important to let this part of the figure dry for at least a day before putting on the torso.  That will help it to be sturdy enough to support the extra weight.

You can create the head and hands now if you'd like.  Take your sausage shape and flatten them out a bit on one end.  Now use your utility blade to cut slits for the fingers.  Gently smooth out the finger tips so they are not so pointy.


I use another one of my gumpaste tools to create fingernails.


I created the head and left it to dry in a flower shaper.  If you want more details on making a fondant face check out my hula girl figure tutorial.

For the torso I took a ball of fondant and shaped out the neck and shoulders, tapering in a bit at the waist.  Sorry this next picture is a bit fuzzy.  Put some tylose glue on the dowels before gently placing the torso on  the legs and through the dowels.


I will admit I didn't create a template and just made the vest freehand. Perfection isn't needed, have fun with it!  You want to put it on before you put the arms on.


I created arms with white fondant.  I flared the ends near the hands a bit to keep the pirate look going.

***TIP***
For best results in attaching arms to your figure.  Cut them at an angle.  They'll attach smoother onto your figure.

I cut some toothpicks a little over half sized and covered in tylose glue.  Stick into the torso and then attach arms on.  That is how I attached the hands as well.  As you can see I've used some supports under the hands to help them keep their shape as they dry.  You'll see in my pirate cake post what these are actually for.  You can use dowels or styrofoam to help as well.


Now back to the figures head.  For his hair I added a sort of blonde blob of fondant on his head.  I kept the top a bit thick for what I'm about to do to it.  I think it looks a bit Elvis at this stage but don't worry it won't look like this for long.
Sorry again for the fuzzy picture, I will have a talking to with my photographer, lol.

My son Mr T had his haircut a few days before his party.  We decided to have some fun and he left with spiky hair so I figured the pirate figure had to match! I took some scissors (only used on fondant of course) and just started "chopping" the hair to get the spiky effect.  I think it came out really fun, don't you?


A few lines added to the back to finish off the look using another gumpaste tool.


Now add some tylose glue to a toothpick and stick some in your figure's head and the rest into the torso to attach.

I added a few more details to finish the pirate effect and forgot to take pictures of these steps.

I added a red belt, which looking back I wish I had done BEFORE I placed the arms on.  It would have been A LOT easier.  I also used my extruder to make a string for the eyepatch.  The eyepatch was just a small blob of black fondant flattened a bit.  After placing the eyepatch on I added a bandana around his head.

I had a great time making this figure and I hope you have fun making one too.  I'd love to see your creations from this post.  Please comment and send me an email, it sure makes my day!

See the little white post behind his bum, yup helping him stay upright =)

Be on the lookout for my pirate cake tutorial and the pirate food post as well. Thanks for visiting!

I'm linking up with these parties this week! Check them out.


Keeping It Simple


Making


Dragonfly Designs


Friday, October 21, 2011

Pirate Ship Masts

I was inspired by pinterest for many of my projects for my son's Pirate Party as you saw in my Pirate Party Decor post.  I love that my hubby is a good sport and plays along with most of my crazy ideas =)  Normally our conversation goes something like this:

Me : "Honey look at how cool this idea looks" as I show him something I've found online.
DH: <Eye roll>
Me: "That looks pretty easy doesn't it?  You could totally make that right?"
DH: "Yes Dear"
He's learned over the years how I like to go a little over the top and luckily for me he is very handy so he can figure out how to accomplish most of what I ask.  I love that guy!

I'd have to say the masts were the biggest project (besides the cake) that we took on.  I was inspired by this picture on pinterest.  Off to Home Depot and Joanns to get the basics.


What you'll need:

3/4 inch PVC cut into the following sizes:
     1 - 6 foot piece
     5 - 2 feet pieces
     3 - 20 inch pieces
     1 - 4 inch or so scrap for the top
3 "x" connectors
1 piece of burlap cut to 46 inches wide by 25 inches tall
1 piece of burlap cut to 38 inches wide by 21 inches tall
Grommets
Twine or rope
Plastic bucket (purchased from the dollar spot at Target)
Vinyl for skull and cross bones
Black acrylic paint
Foam paint brush
Template for skull and crossbones
Drill
Hammer

Connect your pvc together with X connectors.  We chose not to use any glue to save a step,


Drill holes at ends of pvc where sails will connect.  You will drill a total of 8 holes.

While hubby is putting together the base of the mast, ok you can do this yourself but why do it when he can do it for you =) you can paint your skull and crossbones onto your smaller piece of burlap.


I cut out a template from cardstock with my KNK digital cutter.  I purchased the cutting file aye matey pirate set from lettering delights.  I had to divide it in four sections to fit the size I wanted.  I just held the pieces down rather than glue them with a temporary adhesive because:
1. I'm a bit lazy and wanted it done quicker and
2. I figured it's pirate themed so no perfection is needed.


Attach grommets at four corners of each piece of burlap.

Now you are ready to attach your pieces of burlap to your frame.  We purchased rope by the yard at Joanns.  We found it easier to cut longer and then trim afterwards.

Sorry this picture keeps loading sideways.  Just turn your head to the right and you'll make out the holes better.  
If I had to do things over again I'd also spray paint the pvc to hide the writing on them.  My DH thinks it may even scrape off.  Let me know in the comments if you try this and it works or not.

I cut out another skull and crossbones from vinyl on my KNK to place on the plastic bucket.

My husband first tried pre-drilling a hole in the bucket and it cracked  so I would suggest taking your time and being gentle in the process or just glue it with hot glue or some e-6000 glue.

We placed one of the masts in the center of the table we'd be eating at.
The other we placed on our playstructure that turned into our "ship" for the day. I used some leftover fabric from the Happy Birthday Pennant Banner and I think the color it added worked out great.


I planned on making a little flag for the top like my inspiration picture but ran out of time.  Yes I plan too much and usually can't get it all done in time.  Note to self.... Next year either start earlier or plan less.  Ok starting earlier is more realistic.  LOL


Friday, October 14, 2011

Pirate Party Decor

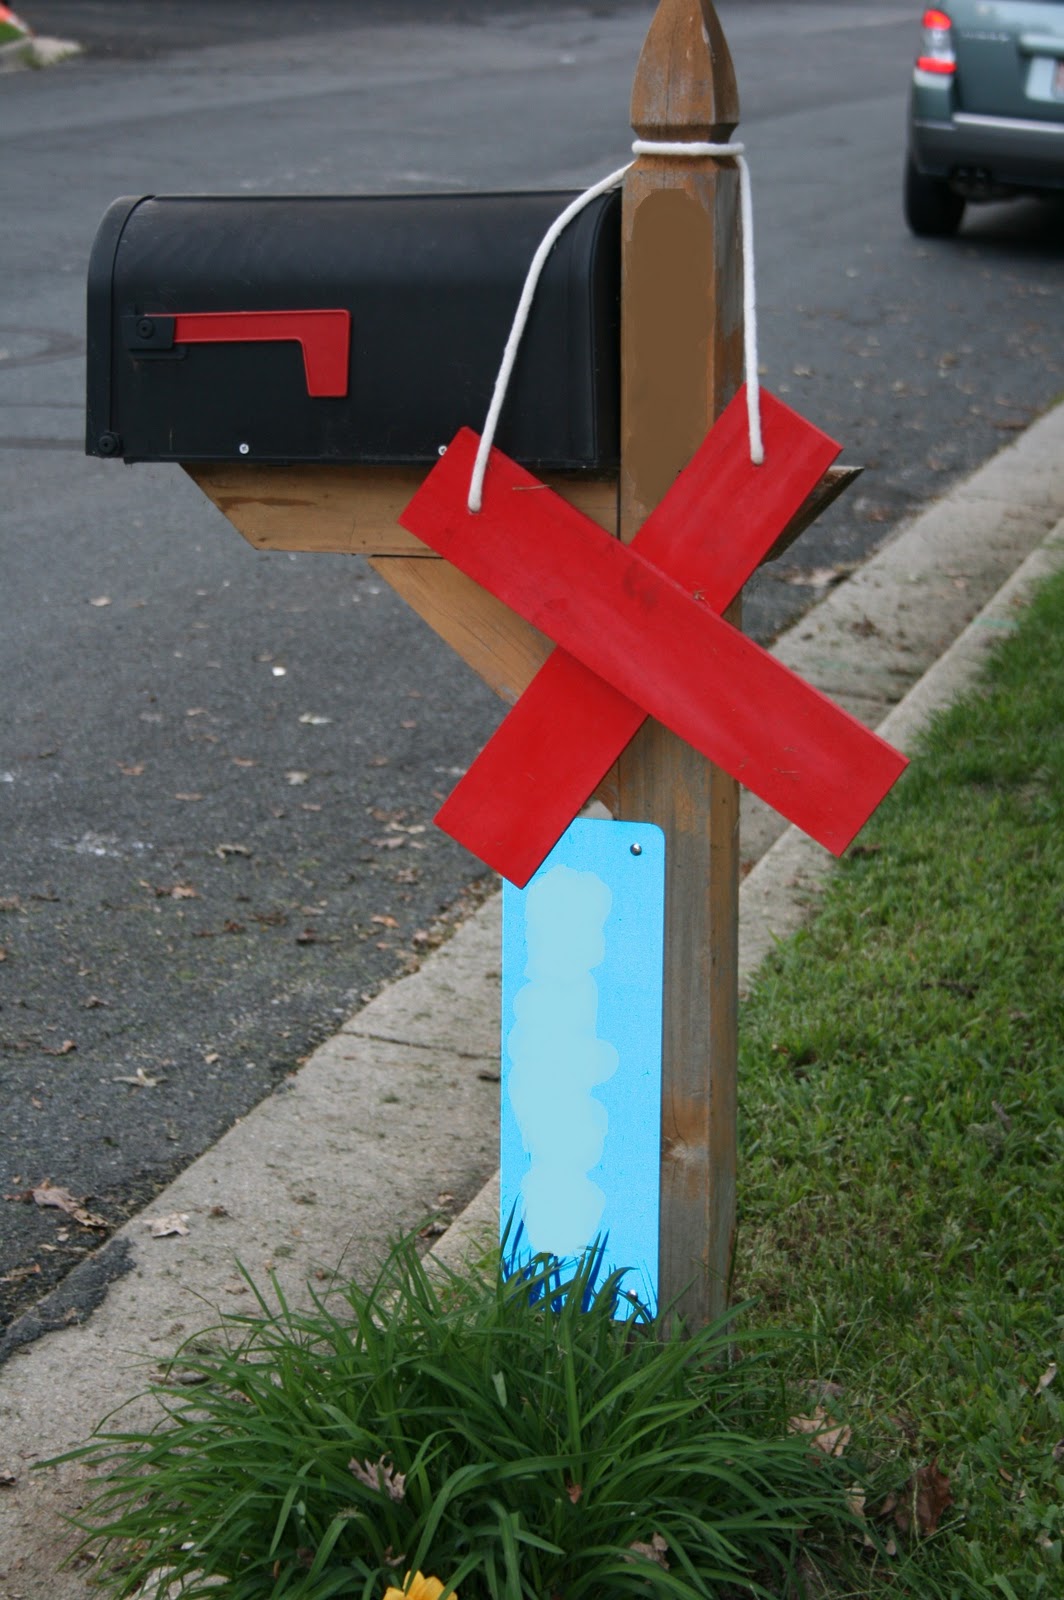
As guests arrived there was no doubt the party was here with the X marks the spot.  My hubby made it with some spare wood, red spray paint, and rope. Inspired from Design Dazzle's pirate party post I came across when I found this picture on pinterest.


I'm so lucky my hubby is a good sport when I show him pictures I find online and ask the dreaded "Babe you can make this can't you?" question.  Be on the lookout for a tutorial on these awesome masts.


We added a ship's wheel and periscope to the play structure to make it more "ship" like.
I collected fabric from Joanns, Hancock Fabrics, and Hobby Lobby to make this pennant banner that's so popular right now.  It's a great time to find pirate fabric with Halloween around the corner.  I used my embroidery machine to attach the letters to the fabric.  You can use scrapbook paper for a similar look if you do not have an embroidery machine.


If I had to do it over again I'd have used a black letter on the damask print so the letter would stand out more.  Oh well as I've said in the past mistakes are what make it unique!

I used the extra fabric to put together another two banners to hang outside for more color.
The dessert table


I made a mini pennant banner hung on skewers, aren't mini things fun?  I bought an unfinished treasure box from Joanns and painted it.  Bought some "jewels" from the dollar store and borrowed some dress up rings and necklaces from my daughter to create the treasure.


This Yo Ho sign was inspired by something I found on Etsy. Another honey can you make this for me project.   


Be on the lookout for more pirate party tutorials and pics.  I especially had a great time making the cake and can't wait to share that with you!

Linking up here this week

Dragonfly Designs